
DIY : SKULLS + NEON CAP
12:41:00 AM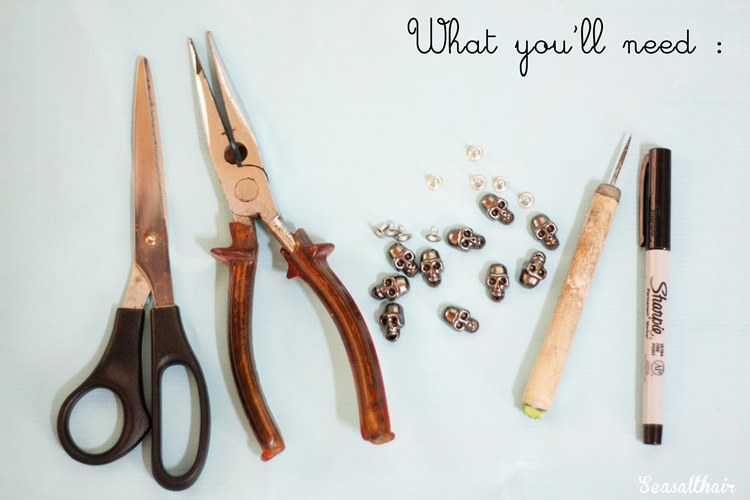
Hey everyone! I'm back with another DIY for you! Are you ready for this? Cool! Before we start, take note of the materials we're using for this project :
1.Cap - Terranova
2.Scissors - you can use this for cutting a small hole for the studs.
3.Long nose pliers
4.Skull studs - Charm's corner
5.Wood carver or anything pointed like this
6.Permanent markers
7.Loctite/Mightybond- (I forgot to add there)

As you can see, these studs is different from all the studs I featured on my DIY projects, since this needs a specific tool for linking. But, I don't have that so we'll just use Loctite/Mightybond instead. You can buy these amazing studs at my favorite studs and spikes shop Charm's corner. Also available in gold and silver!


FIRST : Put tiny dots using your permanent marker on your desired place where you want to put your studs. Start from the center going to the left and the other side.

THIRD : Poke a hole on the mark. Try to make it a little bit bigger so the base would fit.

FOURTH : Insert the base and put on some Loctite/Mightybond before you insert the skull stud.

FIFTH : Continue the process until you finish the pattern. Super easy and fun to do!
Enjoy your new cap!


I also added some circle studs at the back for more style :)
What do you think of my neon pink cap now? Isn't it cute?
I hope you like my tutorial! Let me know if you did this to yours too!

From my Instagram page :) Wearing my DIY cap :)
Follow me @heyakhrazey


0 comments
Thanks!